
Voron 2.4r2 350mm Build – Z Assembly
Since my last post, I was able to complete the Z assembly, which consists of the four Z drives and belt assemblies and the four Z idlers at the top. Building these were pretty straight forward but it’s important to make sure you follow the manual and double check your work. You definitely don’t want to misalign anything or add things things in the incorrect order. It will cause problems and taking these things apart can’t be fun.
I added a modification to the rubber feet, which I’ll highlight below. But for the most part, these parts are by the book with the exception of swapping out standard silver idlers and pulleys for black ones (for my all black theme). I highly recommend printing out the pulley spacing jig because it’s much easier than trying to measure the spacing with a ruler or even with calipers. PRO TIP: when using the spacing jig, place your stepper motor so the shaft is parallel to the surface you’re working on. Don’t work against gravity.
Since I like to get the easy things out of the way first, I opted to build the Z idlers before the Z drives and belt assembly. These went together pretty quickly.


Then it was time to build the belt assembly. Again, these were also pretty straight forward and it was fun to finally see how everything comes together after staring at the manual and the CAD for months. Remember, these are plastic parts so overtightening can be a problem. You should also ensure parts remain aligned when tightening the screws.


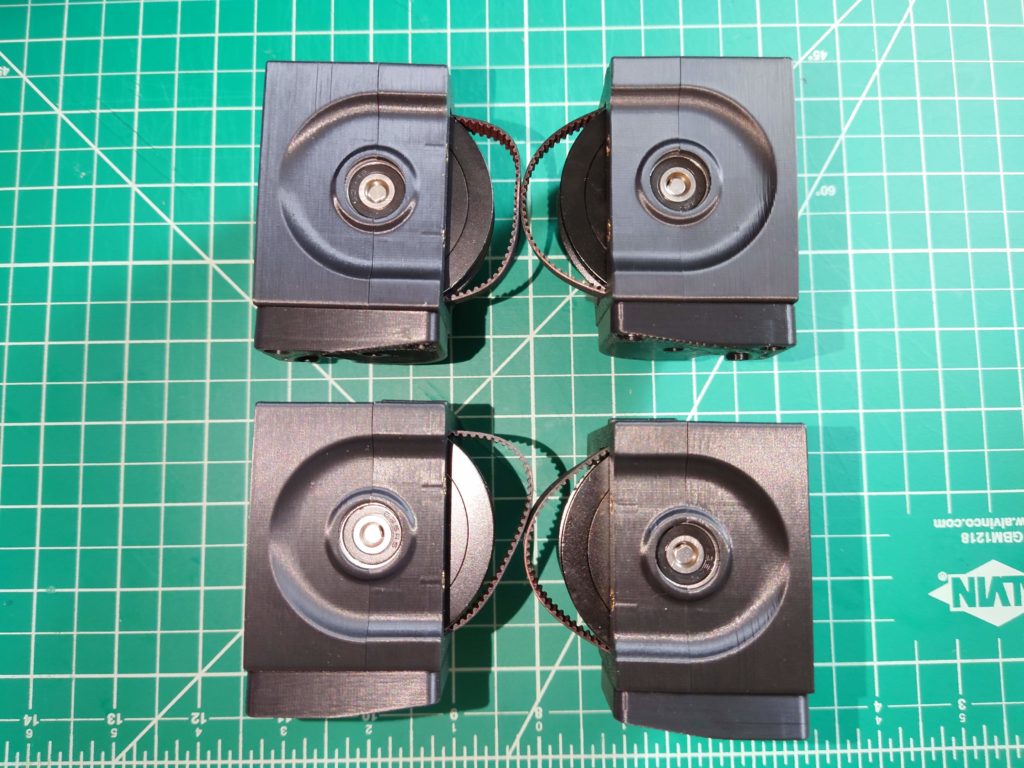
Unfortunately, there are no pictures, but mounting the pulleys on the motors came next. Then it was time to mount everything to the frame. Once again, following the manual and ensuring things line up is important. At this part, it was time to install a modification to the rubber feet. As many of you know, 3D printers can be noisy and a lot of that noise is caused by vibration resonance that is transferred from the printer to the surface it’s sitting on. More often than not, the table you have your printer on is acting like a speaker and amplifying the vibrations. There are several different solutions to address this and even better if you can combine them.
The first method is to make sure you place your printer on a solid and dense material. It’s becoming common for people to place their printers on concrete pavers as they provide a solid and heavy base where vibrations are absorbed, thereby reducing resonance based noise. The second method is adding anti-vibration feet or some kind to the printer. The LDO kit comes with rubber feet as listed in the BOM. These are intended to reduce vibrations, but they aren’t exactly great. After some research and advice from Dustin Speed on the Voron discord, I went with a sorbothane isolation washer. This material is used for vibration isolation and can be found on industrial machines. I ordered a four pack of 70 Duro (higher duro is required for heavier loads) sorbothane washers. I also printed a spacer to go between the washer and the rubber feet, allowing the use of M5x30 screws. Installing them was easy but care was taken not to squish the sorbothane.
I think the final result looks pretty nice and it also raises the printer frame up a bit, which will make the touch screen and skirt mods I have planned look better. Here’s hoping the sorbothane does what it’s supposed to and eliminate a good bit of the printer vibrations.

After mounting the Z idlers and installing the linear rails (again, use the jigs to help you!), the Z assembly was complete. It’s finally starting to look like a printer and I couldn’t be more happy with how everything’s looking so far. Although the manual goes into stalling the build plate next, I’m going to skip to the next chapter and work on the A/B drives and idlers. I know the electronics section is still deeper in the manual and I’d rather not install a heavy build plate that I’ll have to flip upside down. Anyway, see you next time.
